app guide
step-by-step instructions to shoot and share everywhere.
1 / your account
you can create this directly inside the app.
you can also create this on your web dashboard... remember this link!
2 / your profile
before diving in, open settings to complete your profile.
you will see that we created a "team" for you, which you can rename any time.
all your events, content and data, along with additional users and payments, belong to your team.
3 / your events
access all your events inside the app and on your web dashboard.


don't see any events? tap new to create one or tap scan to join one via access code.
4 / new event
open your dashboard and tap new to create a new event.
- titlesets the name of your event
- teamconfirms who controls your event
- capture sets the content type for your event
- filters applies aesthetic presets to your photos
- graphicslayers images over your photos at specific aspect ratios
- labsexperimental features for advanced users
- sharedisplays a unique QR code for each photo
- branded gallerycustomizes the appearance of your gallery
- — logoadds branding to the top of your gallery
- — backgroundadds a background image to your gallery
- — color changes the button color on your gallery
- — font assigns a custom font (via web dashboard only)
- — privateprevents public browsing of your gallery
- — data/legalenables data capture and waivers (via web dashboard only)
once finished, remember to tap create to save your new event.
note: once your event has been created, future changes will save automatically.
5 / scan event
every event has its own unique access code, like this:

this is a powerful feature that allows multiple people to join and upload photos to events.
try creating a new event and showing (or sending) the access code to a friend.
note: codes can be scanned using the native iPhone camera and even imported once saved to camera roll.
6 / open camera
every event has its own camera preloaded with filters and graphics.
try opening the "public test event" and tapping the camera window in the top left corner.
try toggling the flash, flipping the camera and importing photos from your camera roll.
now shoot a test photo.
you'll notice that the native camera captures 9:16 (portrait) and 16:9 (landscape) only.
if graphics have been preloaded into the event for matching aspect ratios, they will appear on your photo preview before upload.
try pressing the preview to see your photo before and after any filters and graphics.


now tap the arrow button to upload.
if sharing is enabled, a unique QR code will appear for sharing.
tap the arrow button again to return to the camera.
rinse and repeat.
7 / add graphics
want to add custom graphics and textures to your photos?
use our template to design and export graphics at standard aspect ratios.
you can load graphics into your event inside the app (import from camera roll) and on your web dashboard (drag and drop) for each aspect ratio you plan to shoot.

when you add or replace graphics, always refresh the event inside the app by closing and opening the event on your phone, then verify the graphics have updated with a quick test shot.
note: graphics are a power feature inside creator/studio/brand events only.
8 / delivery + data
every event has its own web gallery filled with photos.
galleries are private by default, meaning that people who scan a QR code will only see their own photos.
you can make your gallery public by switching the private toggle when adding or editing the event.
you can also customize your gallery with your own logo, background and colors.

need data capture, too?
brand subscribers can add forms and waivers from your web dashboard.
contact us for more info on subscriptions for brands and agencies.
note: data capture and legal are power features inside brand events only.
9 / users + teams
do you work with multiple teammates and photographers?
add them to your team and set permission levels individually.
for example, when you scan people into your events to shoot and share photos, they join as "photographers" with minimal permissions — this allows them to upload photos, but doesn't allow them to do other things, like edit events, delete content, or access data that belongs to your team.
you can assign different roles to any user on your team to enable more permissions.
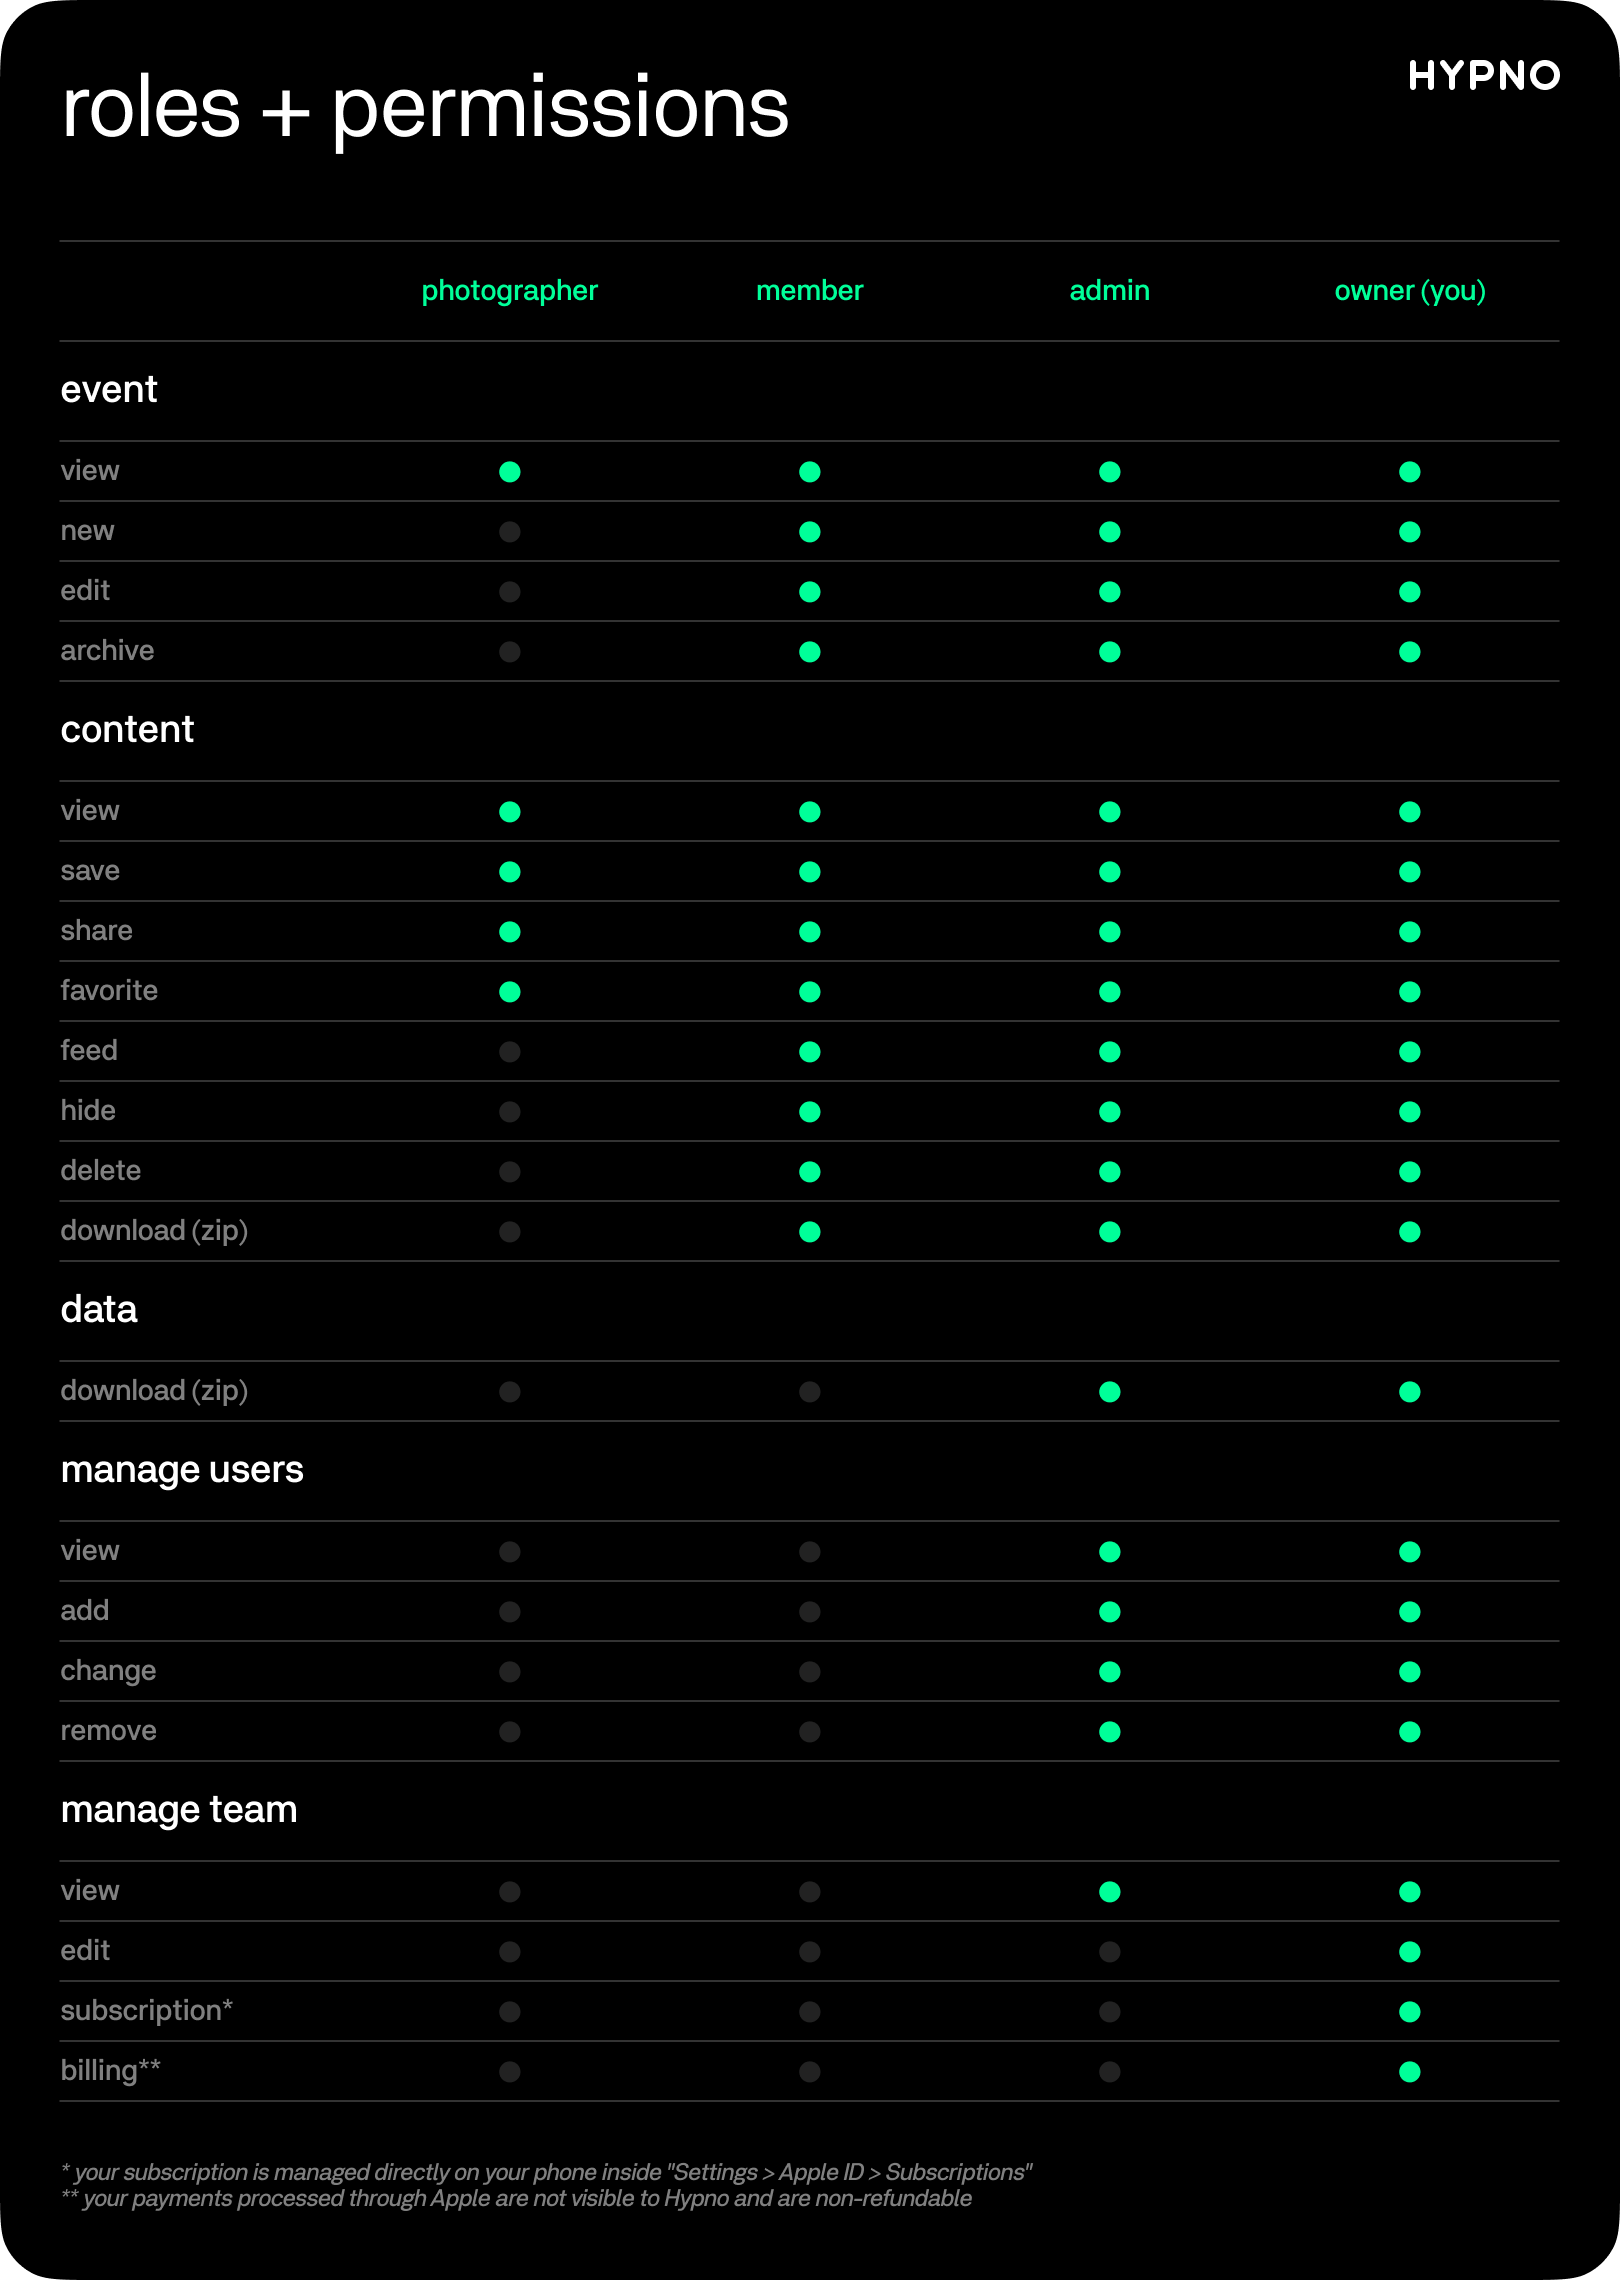
as the team owner, go to settings > team in the app or on your web dashboard to manage every aspect of your team, including your users, subscriptions and billing.
10 / credentials
keep your account credentials private.
if someone else signs in as you, they will have access to all your content and data and you will be signed out automatically.
instead, you can scan other people into your events as "photographers" and/or add them as "members" and "admins" inside settings > team in the app and on your web dashboard.
note: account sharing may result in a locked account.
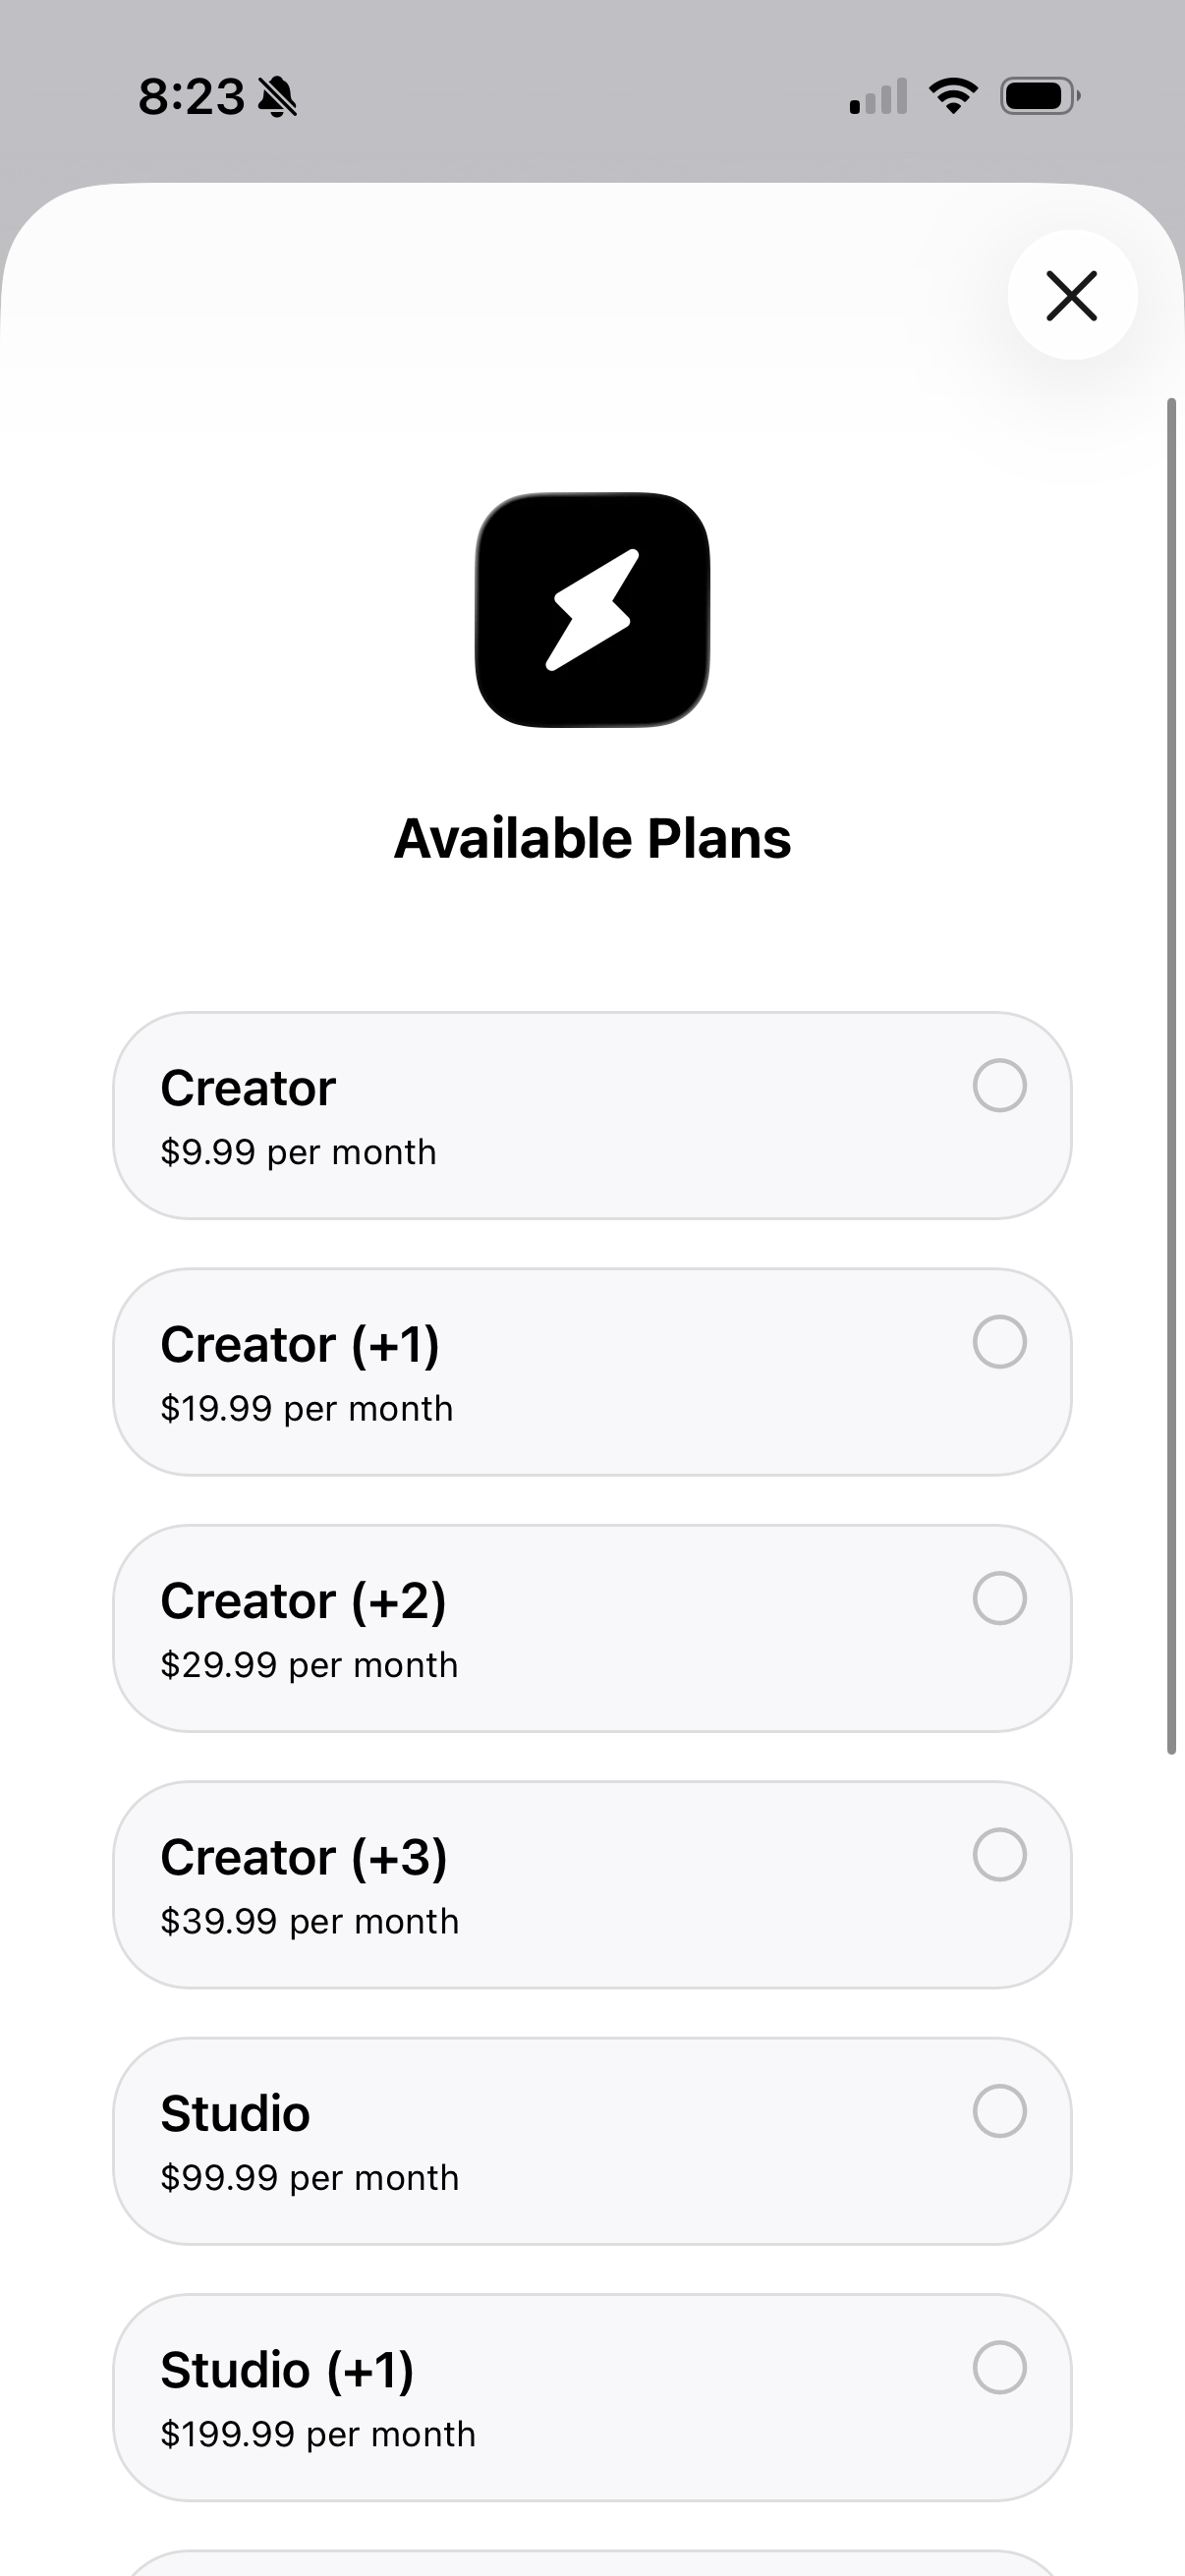
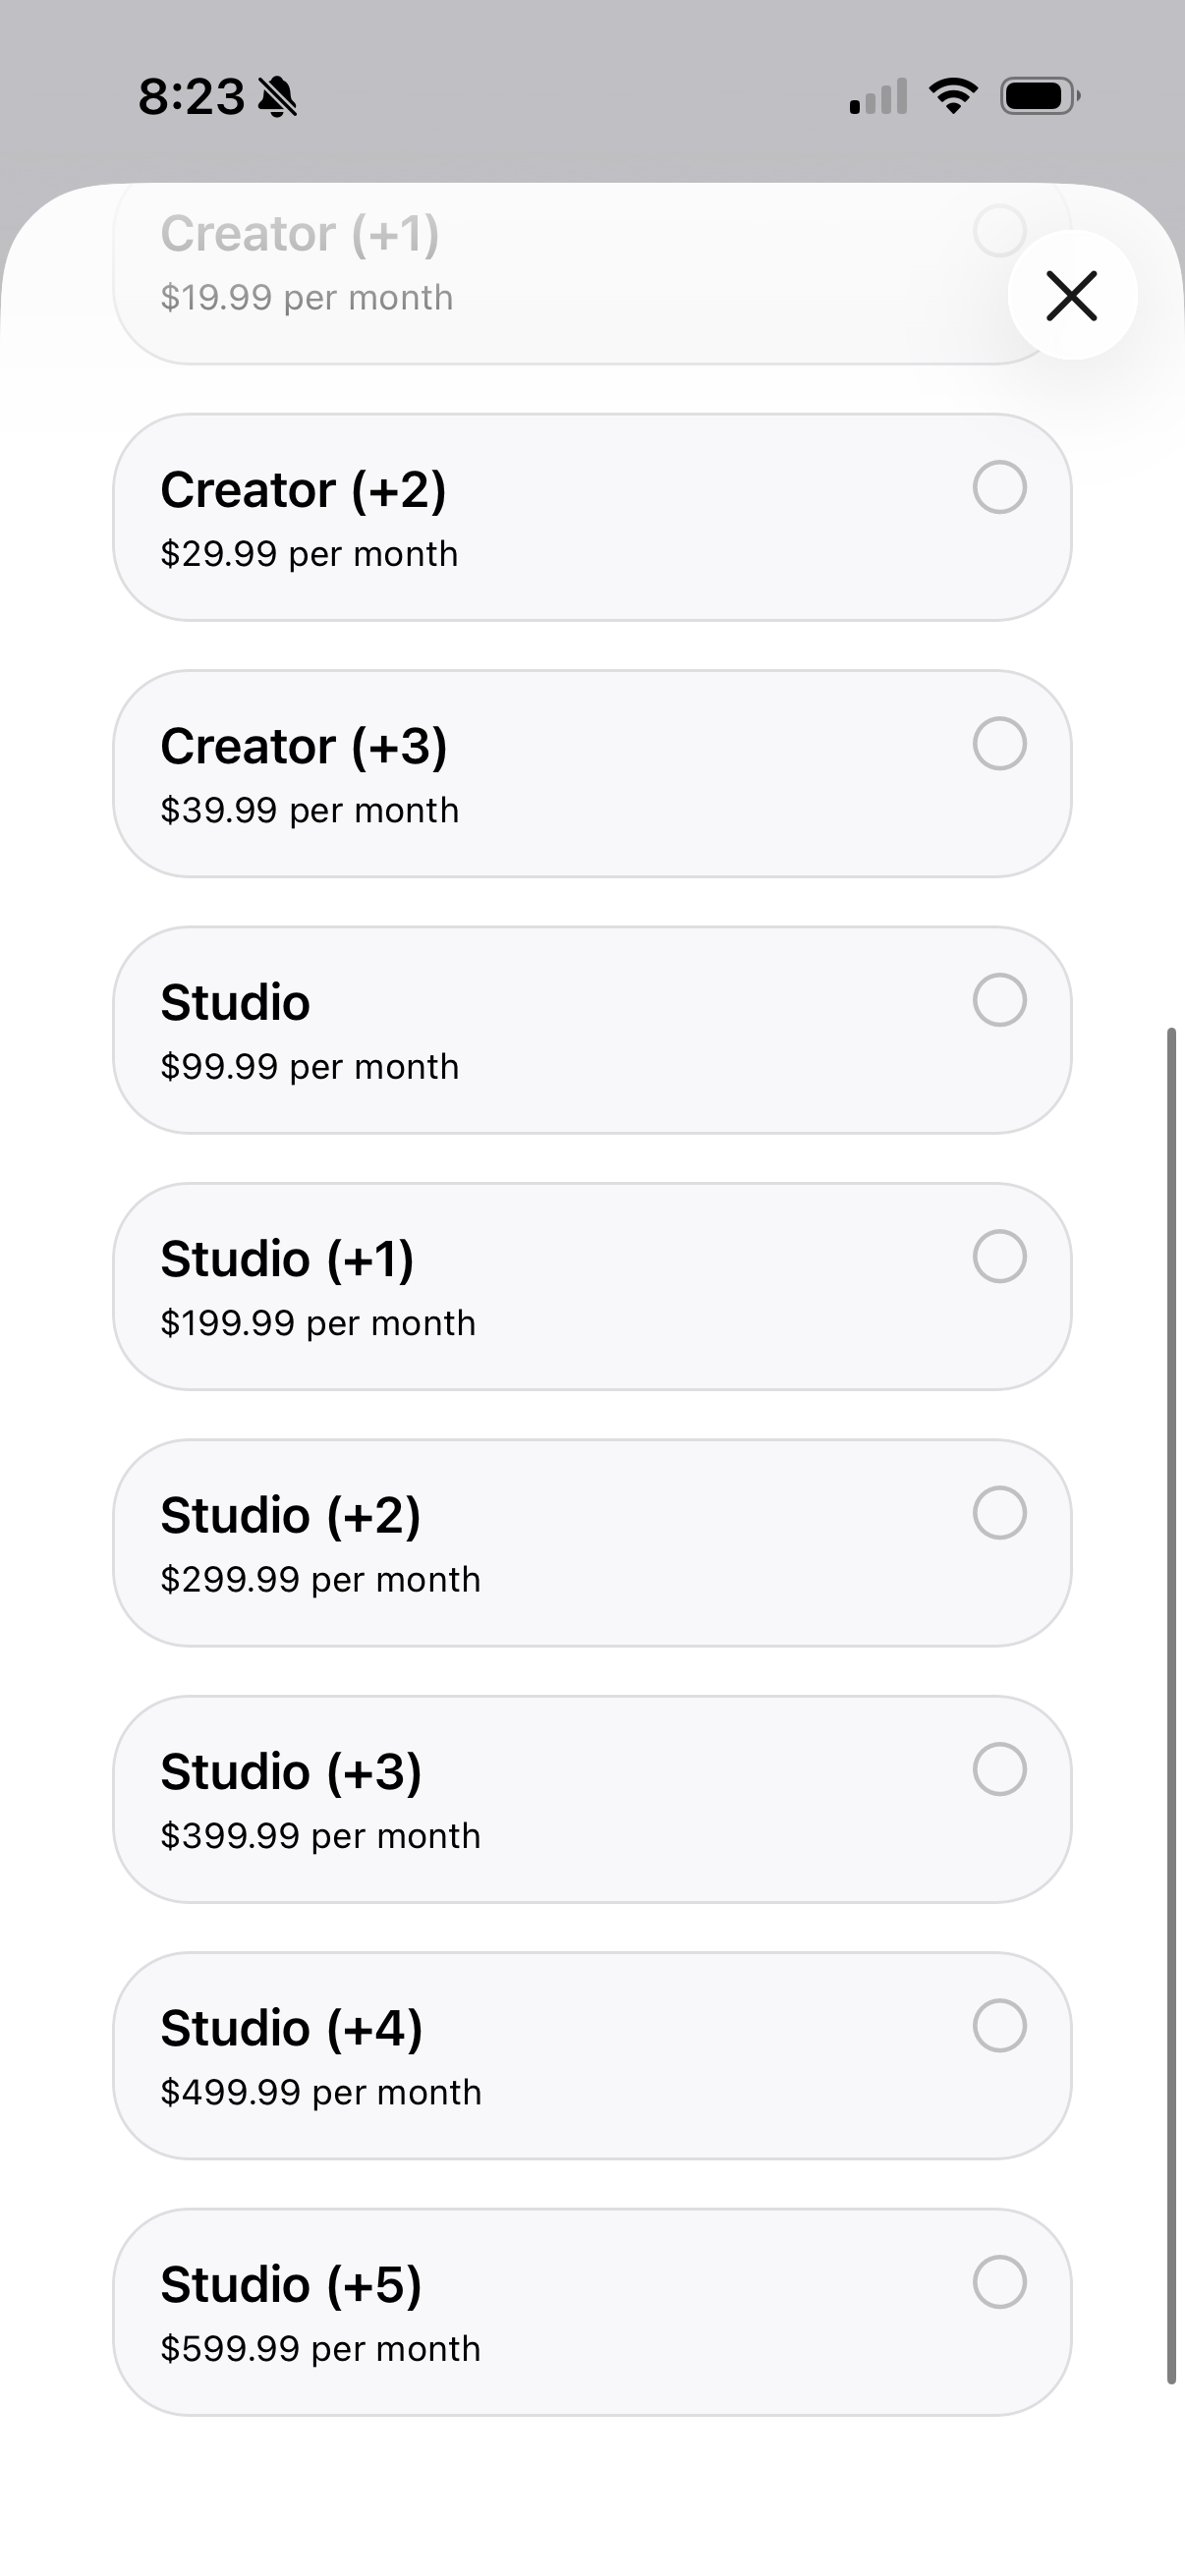
11 / subscription
like most software, you'll need to pay for each user who joins your team.
user limits and pricing depend on your subscription tier and local currency (see USD shown below).
creator plans can add up to 3 additional users.
studio plans can add up to 5 additional users.
need more users? contact us about unlimited plans for brands.
remember, subscriptions and billing are processed directly by Apple and managed exclusively by team owners inside settings > apple id > subscriptions on your phone.
note: we cannot change your subscription tier, change your billing info or process refunds for Apple payments.
12 / camera connect
every event works with the native camera on your phone.
professional photographers can also connect cameras from Canon, Nikon and Sony.
this allows you to shoot and share multiple photos at max resolution and different aspect ratios.
 camera setup →
have a camera? follow the steps above and test your camera in the "public test event" on your dashboard.
note: camera connect is a power feature that works inside studio/brand events only.