camera setup
shoot + share photos instantly using professional cameras.
welcome
hypno pro is the world's fastest photo workflow.
our app connects professional cameras to your iPhone for instant upload and delivery.
compatible with modern cameras from Canon, Nikon and Sony.
follow this guide to connect your camera for the first time.

wired connections
the fastest way to connect your camera is with a usb-c cable.
modern cameras with usb-c ports from Canon, Nikon and Sony are broadly supported.
you don't need expensive "tether" cables or other gimmicks to connect.
newer iphones (usb-c)
iphones with a usb-c port (ex: iphone 15/16/17) simply need a usb-c cable:

older iphones (lightning)
iphones with a lightning port (ex: iphone 12/13/14) do NOT work with a usb-c/lightning cable.
they require apple's official "usb3 camera adapter" with a separate usb-c/a conversion cable.
look carefully at the cables below...


we've shot 100s of events using older iphones with lightning ports — works great.
just plan ahead and order online since they can be hard to find locally.
wireless connections
shoot + share without wires using Canon's exclusive CCAPI technology.
make the connection
you're almost ready to capture and upload photos!
first confirm the following:
(1) your camera is set to capture JPG
(2) your camera has a freshly formatted SD card
(3) your camera dial is set to "photo" mode (not video mode)
once confirmed, connect your camera and phone.
open the app
(4) tap into our "public test event"
(5) now tap the camera block (top left)
(6) then tap the camera icon (bottom left)
(7) power on your connected camera
the "camera connect" screen should update to display the name of your camera.
note: you can only connect cameras to events created by studio and brand subscribers, like our public test event.
note: if you have a free or creator account, upgrade to studio in order to connnect a camera to your own events.


shoot and share
once your camera name appears, press the shutter button on your camera.
photos should transfer to your phone quickly and fill the grid.
press the white arrow to upload your grid of photos.
this will display a unique QR code for this set of photos.
scanning this QR will link to these photos only.
note: depending on your iPhone model, we recommend shooting no more than 10-20 photos into the grid before pressing upload, otherwise your phone will run out of memory, which can crash the app and delete your grid of photos (originals are still saved locally on your SD card).
known issues (and fixes)
in some cases your "camera connect" screen may not display your camera name.
in other cases, it may display your camera name, yet fail to transfer photos.
make sure your camera is set to RAW+JPG (or just JPG).
due to filesize, our app ignores the RAW files on your card and needs JPG files instead.
if you're still unable to connect:
(8) confirm the basic steps 1-7 above
(9) try a different SD card in your camera
(10) try a different USB cable and/or adapter
(11) disable the WIFI feature on your camera
specifically for canon cameras:
(12) confirm the folder name on your SD card is "100CANON"
(13) confirm the filenames for your photos use the "IMG_" prefix
specifically for sony cameras:
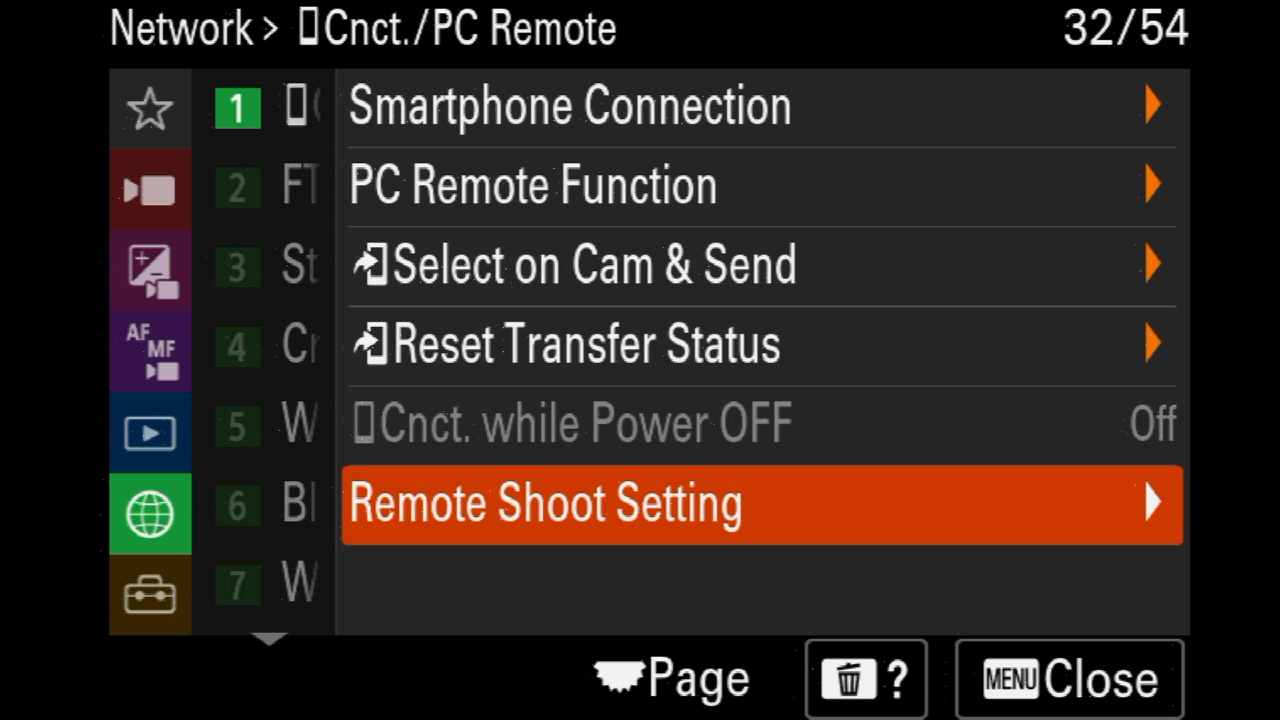
(14) set "usb connection" to "pc remote" or "remote shoot" (differs by model)
(15) set "pc remote settings > still img save destination" to "pc+camera" (ex: A7Riii)
(16) set "remote shoot setting > save image size" to "original" (ex: A7Riv)


if you're still unable to connect after following the steps above, please contact us:
optimize your camera
once you have a working feel for the app, start playing with your camera settings:
(a) adjust image resolution and quality based on the needs of your project
(b) your originals always save to your SD card — including RAW files
(c) final photos are exported at max 4096x4096 resolution
↓


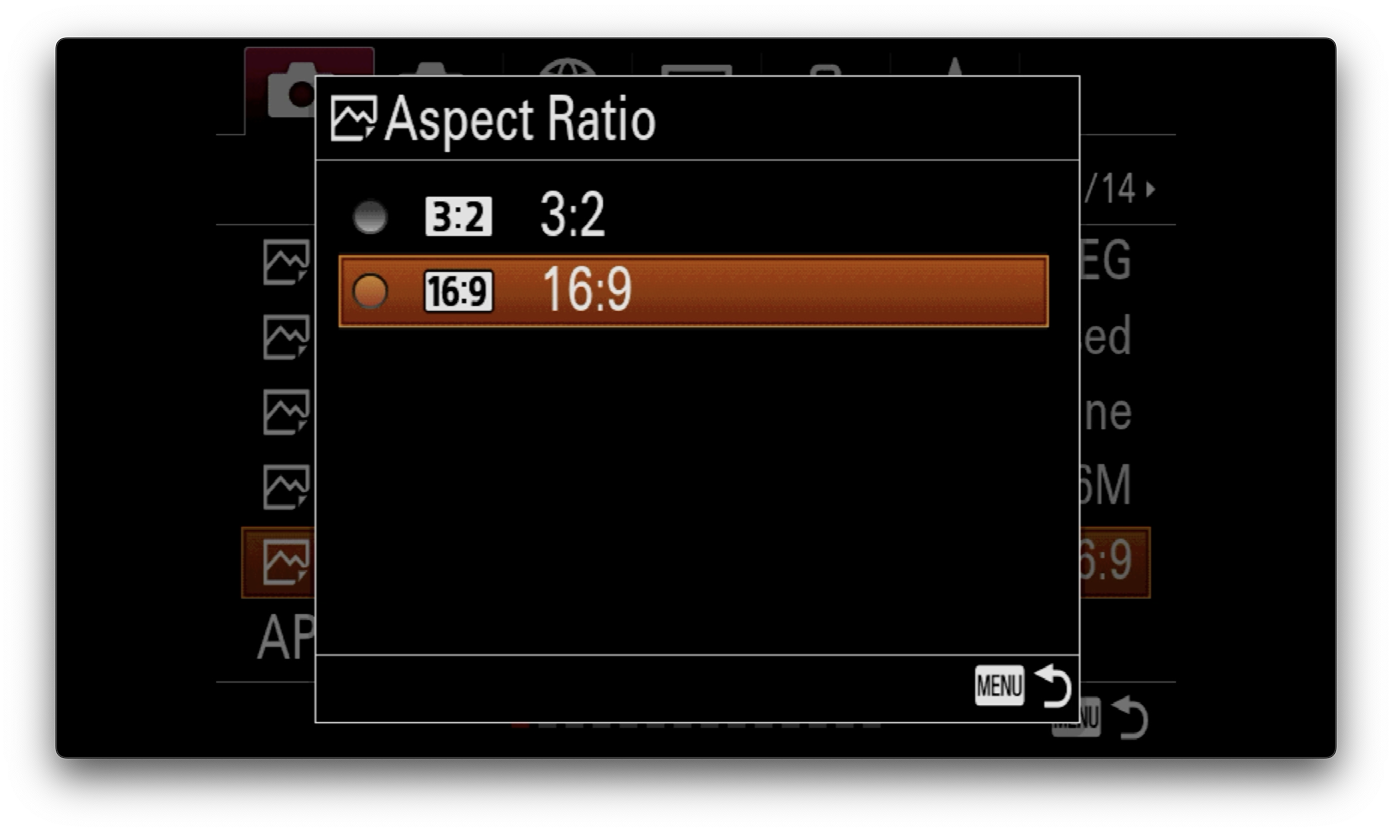
(d) set your "aspect ratio" directly on your camera.
for example, setting 1:1 on a Canon camera will transfer square photos to your phone.
note: different camera makes/models may offer different aspect ratios.
↓


(e) disable power-saving features
your camera connection will drop if your camera powers off.
↓


(f) disable "auto connect" on your camera WIFI
this can create connection conflicts between wired and wireless connections.
note: you may need to "disconnect" your private WIFI connection first to enable/disable this menu setting.
↓


keep in mind that different camera models from the same brand may have different menus.
new models, menu systems and firmware updates are released constantly.
you are responsible for being familiar with how your camera works :)
graphics
add instant branding to your photos using our professional templates.

graphics can be uploaded from our app or web dashboard (see below).
when customizing graphics, size each graphic to match each "aspect ratio" you plan to capture.
shooting on your phone?
by default, you can capture 9:16 and 16:9 photos with matching graphics.
shooting on a professional camera?
you can capture photos with matching graphics at any aspect ratio available on your camera.
shooting for instagram feeds?
you can enable the 4:5 toggle inside "labs" to capture and crop photos with matching graphics.
note: custom graphics and 4:5 cropping are only available in events created by studio/brand tier subscribers
gallery
upload your photos to branded galleries with custom data capture and legal.

add your logo, background and font to customize the look of your gallery.
need data capture? brand subscribers can easily configure custom forms and advanced legal.
note: please contact us to customize data capture and legal .
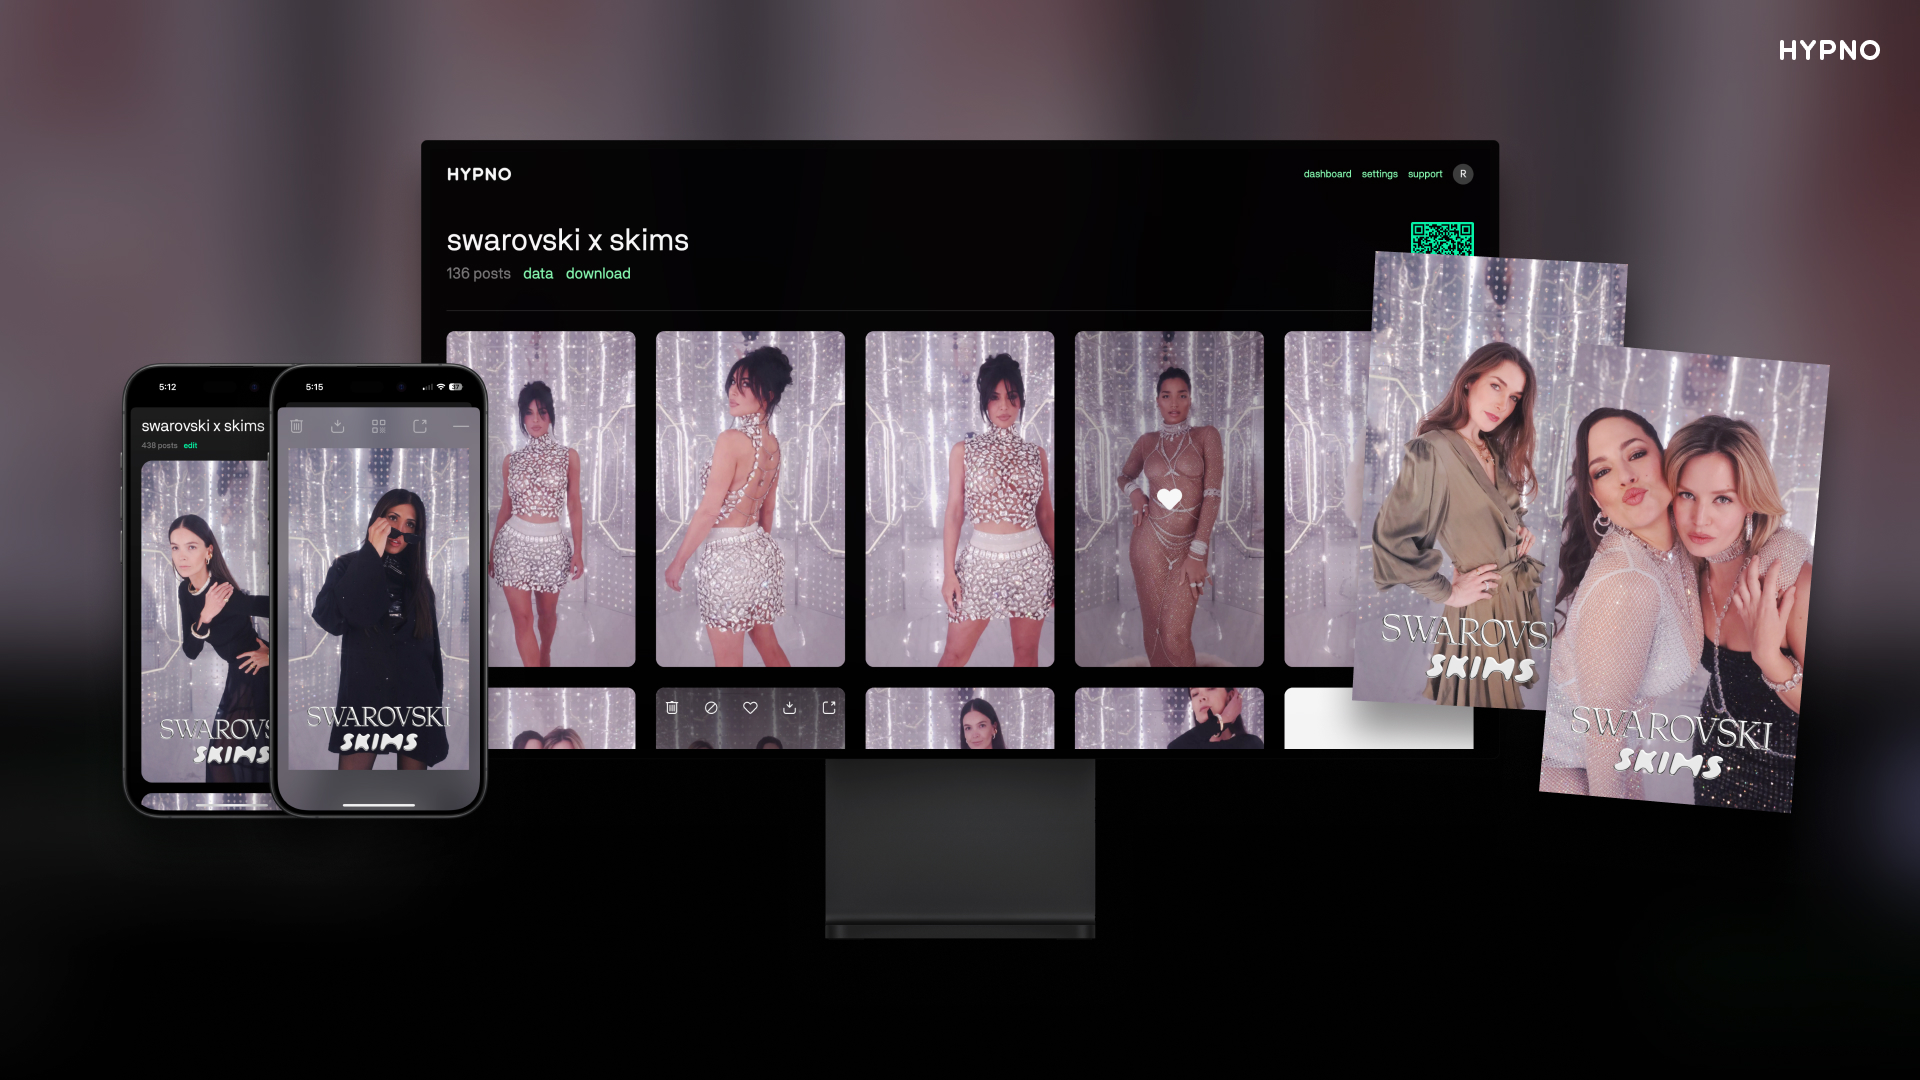
dashboard
manage everything in real-time from your team dashboard.
brand admins, agency leads and content teams can create and edit events, customize graphics and galleries, browse content and download data — all based on individual user permissions.
our dashboard offers a more robust interface than our iphone app and enables power features that are much easier to manage from a laptop.